from Rob Legg Yachts | |||||
|
|
|
|
|
||
Episode 5: Designing the RL28
It was time now to move the hull plug to the factory and prepare it for making the mould.
Go back to Previous Episode | Go back to Index | Go on to Next Episode
First a water line was established and marked top and bottom with thin masking tape. This was to show up on the mould for future masking. Then three coats of mould release wax were applied and well buffed up. A false transom was made up some two inches bigger all round and clamped to the stern. This was for forming a flange on the mould to which it would be bolted. (This was because the transom had a reverse angle and a boat could not be removed from the mould unless it was detached first).

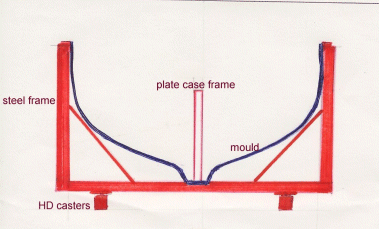
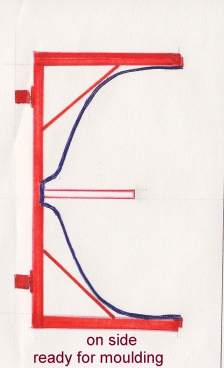
A coating of PVA was sprayed over the whole surface. This would form a very thin film, (not unlike cling wrap) and form a complete barrier between the hull and mould. Black tooling gel coat is normally used on moulds. The black colour serves two purposes; it is easy to see any faults, dust or moisture on the surface; and when the operator is spraying the gel coat on for a boat, he can see if it is not covered properly as the black shows through. The mould was laid up over several days to ensure that that there was no distortion. and when properly cured. the steel framing was made up. It is essential that a mould remains rigid so steel framing was used. First a steel trimming edge was attached around the sheer line; then two frames constructed of 4x2 inch RHS were made to surround the hull. These would enable us to roll the mould on its side when laminating.

The whole assembly was rolled up the right way; a chain hoist attached to the plug, and after some difficulty, removed the plug by freeing the sides with long thin soft wood wedges; then letting water in around the edges, and after a few thumps around the bottom ,the plug floated free. That was a relief, sometimes new moulds really get stuck! With the plug removed, the only steel work left was to bolt on the frame that would hold the plate case. With plenty of help now we started the same procedure as on the plug. Very fine wet and dry; two grades of cutting compound; Brasso; then five coats of release wax. Now we were ready to mould the first hull, and we needed two hulls urgently. The first for building the deck plug on and another to build the five interior furniture plugs in. Still a long way to go!
|


